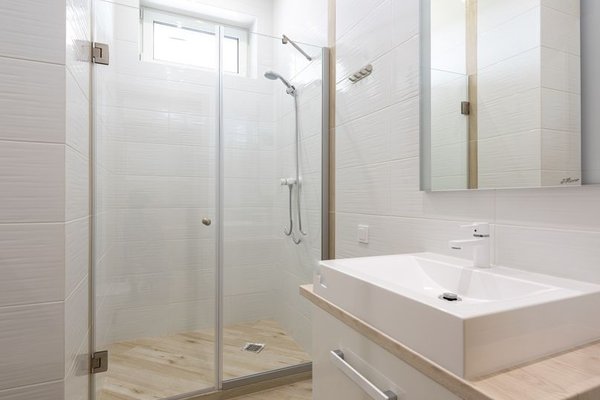

A bathroom renovation can go off schedule long before the new tiles arrive. The plumber discovers that the chosen basin needs a different waste position, the electrician has to reopen a finished wall, or the tiler turns up before the floor is ready. Most of these setbacks come from doing the right jobs in the wrong order.
The typical bathroom renovation order of work is planning, strip-out, inspection, first-fix plumbing and electrics, preparation and waterproofing, tiling, second-fix installation, then sealing and testing. The exact sequence varies with the layout and products, but each stage should leave the room ready for the next trade.
Make the decisions that affect hidden work first
Choose the bath or shower, toilet, basin, taps, extractor and lighting before anyone starts moving pipes. Product dimensions matter more than a rough sketch. A wall-hung vanity, for example, needs its waste and water connections in different places from a pedestal basin, and its fixings may need extra wall support.
Agree the finished floor height, door clearance, tile thickness and positions of any niches or concealed valves. Confirm how the shower will drain and where ventilation will discharge. For more help with the layout stage, see our bathroom layout planning guide.
The practical bathroom renovation sequence
1. Strip out the old bathroom
Protect access routes, isolate the necessary water and electrical supplies, and remove old sanitaryware, coverings and damaged backing materials. Demolition should be controlled: concealed cables, pipes and older building materials may create hazards. Arrange professional assessment if suspect materials are uncovered.
Once surfaces are exposed, inspect for leaks, rotten timber, uneven floors, poor ventilation and weak walls. This is the best moment to revise the programme. Covering a damp or unstable surface simply stores trouble for later.
2. Complete structural changes and drainage planning
Repair the subfloor, alter partitions where required and establish the position and fall of waste pipes. Confirm that the intended shower tray, bath or wet-room drain can connect without awkward compromises. Structural alterations and significant drainage changes may require approvals or specialist design.
3. Carry out the bathroom first fix
Bathroom first fix means installing or altering the pipework, waste connections, wiring and supports that will later be covered. The plumber sets out water supplies and drainage; the electrician prepares locations for lights, fans, heating and other electrical equipment.
Have the trades coordinate before walls close. A mirror light can clash with a basin cabinet, and a shower niche can interrupt a planned pipe run. Photograph pipe and cable routes with a tape measure visible so future drilling is safer and easier to plan.
Pressure-test or otherwise test relevant plumbing connections and have electrical work inspected as appropriate before covering it. Bathroom electrics have special safety requirements. In England and Wales, applicable Building Regulations, including Part P, must be followed; use a suitably qualified electrician and confirm any notification or certification needed.
4. Prepare walls and floors
Install suitable wall boards, reinforce fixing points and make the floor sound, level and compatible with the chosen finish. Wet areas need substrates and systems designed for that exposure; ordinary decorative finishes are not substitutes for proper preparation.
Plaster, levelling compounds and other materials need their specified drying or curing time. Do not book the tiler solely by counting calendar days: site conditions and product instructions determine when a surface is ready.
5. Install waterproofing before tiling
Showers and wet rooms require a correctly detailed waterproofing system behind the finish, including attention to corners, joints, pipe penetrations and changes of plane. Tiles and grout alone should not be treated as the waterproof barrier.
Some items belong in place before the surrounding tiles. A shower tray or fitted bath, for instance, may need to be positioned and integrated with the specified waterproofing details first. Follow the manufacturer’s system rather than assuming every fixture is installed at second fix.
6. Set out and install the tiles
The tiler checks levels, tile layout, visible cuts, trim positions and junctions before fixing anything permanently. Whether the walls or floor are tiled first depends on the room, chosen method and protection required; there is no universal rule.
Allow the specified adhesive and grout curing periods. Keep other trades away from fresh surfaces, and protect completed floors before carrying heavy fittings through the room. Explore our guide to choosing bathroom wall and floor tiles for finish ideas.
7. Complete the bathroom second fix
Bathroom second fix is when visible fittings are connected, secured and commissioned. The exact bathroom fitting order depends on access, but it commonly includes the toilet, basin or vanity, taps, shower controls, screens, lighting, extractor grilles and accessories. Some fittings may be assembled earlier or installed in stages.
Check that cupboard doors open, taps reach their intended positions and shower screens clear nearby fixtures. The electrician should complete and test electrical connections, while the plumber checks flow, drainage and leaks under normal use.
8. Seal, decorate and inspect
Apply compatible sanitary sealant at specified movement joints and fixture junctions after surfaces are ready. Do not use silicone to disguise poor waterproofing or loose fittings.
Run the shower, fill and drain the bath, flush the toilet and check beneath the basin. Look for drips, slow drainage, pooling water, noisy fans and uneven doors. Record snags and collect relevant certificates, warranties and product instructions before signing off.
Plan trade handovers, not just start dates
Suppose your new walk-in shower needs a recessed mixer and a tiled niche. The plumber and tiler should agree valve depth and niche position before boarding. Waterproofing must then be complete and cured before tiling. Booking the glass installer too early achieves nothing if the finished dimensions have not been measured.
Use a simple handover rule: no trade begins until the preceding work has been checked and the surface is ready. Allow a contingency for hidden damage, supply delays and drying time. For a broader checklist, see our bathroom renovation planning guide.
Frequently asked questions
Does plumbing come before tiling in a bathroom renovation?
Yes. Hidden supply and waste pipework normally goes in during first fix, before boards and tiles. Final taps, traps and other exposed connections are generally installed or completed during second fix.
Should the shower tray be fitted before wall tiles?
Often, yes, because the tray may need to be integrated into the wall waterproofing system. The correct detail depends on the tray, enclosure and manufacturer’s instructions.
When should an electrician visit?
Typically during planning, first fix and second fix. Electrical testing and any necessary certification must also be arranged. Coordinate visits with the plumber and tiler so finished surfaces are not reopened.
How long does the whole sequence take?
A straightforward refit may take around two working weeks, but complex layouts, wet rooms, repairs and product delays can extend that considerably.
A smoother finish starts with the right order
The best bathroom renovations are planned around what must be hidden, tested or allowed to cure before the next step. Finalise the layout, coordinate the first fix, protect waterproofing, and leave visible fittings until their surfaces are ready. That discipline reduces avoidable rework and gives every trade a better chance to finish properly.