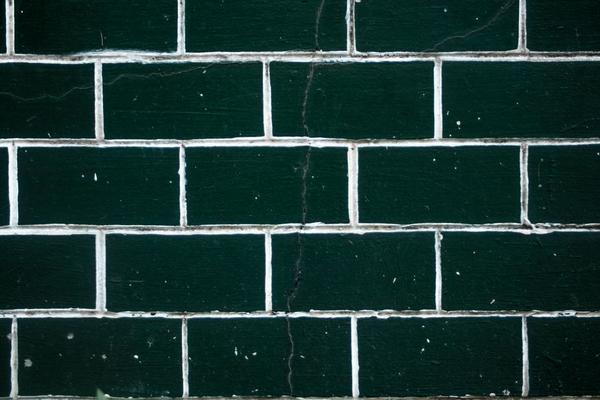

A thin crack in a grout line can be easy to ignore, especially when the surrounding tiles still look fine. But that little gap is worth checking. Sometimes it is simply aging or poorly bonded grout; other times it is the first visible sign that a tile, floor, or wall is moving. Learning how to repair cracked grout starts with telling those situations apart.
For a short crack between firmly attached tiles, replacing damaged grout is usually manageable. The goal is not to smear fresh grout over the split, but to remove unsound material and check that the joint is suitable for grout.
Decide Whether the Crack Is a Small Repair
Look closely at the damaged joint before reaching for a tool. A small repair makes sense when the crack affects a limited section, neighboring tiles feel solid, and the area shows no ongoing dampness. Tap nearby tiles gently and compare the sound with tiles farther away. A hollow sound alone is not proof of failure, but a tile that rocks or lifts needs attention before regrouting.
Common grout crack causes
Grout can crack if it was mixed with too much water, washed too aggressively during installation, or applied over a poorly prepared joint. Subfloor flexing, building movement, and loose tiles can also break rigid grout. Repeated cracks in the same place suggest that replacing the grout alone may not solve the problem.
Signs to investigate first
Pause the repair if you notice spreading cracks, loose tiles, soft wall material, persistent dampness, musty smells, or a joint that reopens soon after filling. In showers, unexpected moisture outside the enclosure deserves investigation. Grout is not the waterproofing layer of a properly constructed shower, so a tidy repair cannot fix failed waterproofing behind the tile.
Location matters too. The line where a tiled wall meets a floor, tub, countertop, or another wall is often a movement joint. Such transitions generally need flexible sealant rather than rigid grout. Our guide to choosing bathroom sealants is useful when the crack sits in a corner.
Gather Tools and Choose Matching Grout
For a small cracked tile grout repair, gather a grout saw, safety glasses, an appropriate dust mask, a narrow vacuum attachment, a clean sponge, fresh grout, and a small rubber grout float. Protect delicate tile edges and nearby fixtures. Avoid aggressive grinding around easily chipped tiles.
Identify the existing grout before buying a replacement. Sanded and unsanded cement products suit different joint widths; epoxy and premixed grouts have separate compatibility requirements. Match the product to the tile, joint width, and exposure conditions. Colour samples may not match aged grout exactly, so test a discreet spot when appearance matters.
How to Repair Cracked Grout Step by Step
Remove the cracked and loose material
Work slowly along the damaged section with a grout saw, staying centred in the joint. Remove crumbling material and enough existing grout to provide the depth required by the replacement product. For many cement-grout repairs, manufacturers advise removing approximately two-thirds of the joint depth instead of applying a thin surface skim. Check the product’s directions and avoid cutting into the tile or waterproofing beneath it.
If the joint keeps shedding powder or exposes a moving tile, stop. This is no longer a straightforward loose grout fix. Regrouting over an unstable base often recreates the crack.
Clean and prepare the joint
Vacuum out dust and grit, then wipe the surrounding tile. The joint should be free of soap residue, grease, and loose particles. Follow the grout manufacturer’s instructions about whether the joint should be dry or lightly damp; formulations differ. Do not leave standing water in the groove.
Press in fresh grout
Prepare a small batch, following the specified mixing ratio and resting time where applicable. Use a rubber float held diagonally across the joint to pack grout firmly into the recess. Make several passes to reduce empty pockets, then scrape excess material from the tiles without digging into the filled line.
At the product’s stated initial-cleaning stage, wipe diagonally with a barely damp sponge. Rinse and wring it out frequently; flooding fresh cement grout can weaken it or alter its colour. After the recommended interval, remove remaining haze using a method approved for the tile and grout type.
Let the repair cure undisturbed
Keep the repaired area away from splashes and foot traffic for the period on the packaging. Cure times vary, so a universal overnight rule is unreliable. If sealing is recommended, allow adequate curing and follow the grout and sealer instructions. Some products do not require sealer.
A Practical Example: One Cracked Backsplash Joint
Imagine a short crack halfway along the grout line between two kitchen backsplash tiles. Neither tile shifts when pressed, the wall is dry, and the crack has not spread. That is a reasonable candidate for a local repair: remove the failing section, clean the joint, and refill it with compatible grout. Check it again after several weeks.
Now imagine the same crack exactly where the backsplash meets the countertop. That joint experiences movement as surfaces expand and loads change. More rigid grout may produce another split. An appropriate flexible sealant is usually better in a properly prepared joint. A guide to maintaining kitchen backsplashes can help you spot other vulnerable transitions.
Keep the Repaired Grout in Good Condition
Regular grout maintenance is simple: use a tile-safe, non-abrasive cleaner, rinse away residue, and avoid harsh scrubbing. Address leaks and persistent condensation instead of repeatedly treating stains. Our guide to cleaning tile and grout covers gentler everyday methods that help preserve the finish.
Inspect the repair after cleaning and again after a few weeks. A stable, even line is reassuring. Fresh cracks, recurring powder, or dampness are reasons to investigate the cause rather than layering on more grout.
Frequently Asked Questions
Can I put new grout directly over cracked grout?
Usually not with conventional cement grout. A thin coating over old, cracked material can fail quickly. Remove damaged grout to the depth specified by the repair product, then clean and refill the joint.
Should I use grout or caulk in a shower corner?
A suitable flexible sealant is generally the right material at changes of plane, including wall-to-wall and wall-to-floor corners. Choose one rated for the wet location and investigate ongoing moisture before sealing.
Why does my new grout keep cracking?
Recurring cracks may indicate movement, unstable tiles, unsuitable materials, or mistakes in mixing and curing. Check for loose tiles. If movement or moisture damage is suspected, have the assembly assessed instead of repeating the patch.
How long before I can use the repaired area?
Follow the replacement grout’s instructions for cleaning, foot traffic, water exposure, and sealing. Those intervals vary by product and conditions, especially in damp or cool rooms.
A Small Repair Is Also a Useful Checkup
Knowing how to repair cracked grout can improve a tiled area’s appearance, but inspection matters as much as the patch. Where tiles are stable and the joint is suitable for rigid grout, careful removal, compatible material, and curing make a sensible repair. Where cracking signals movement or moisture, addressing that cause first is what makes the fix worthwhile.